|
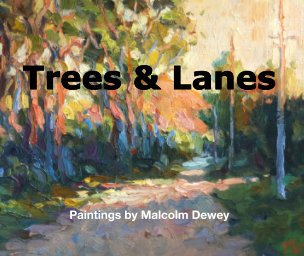
Do you have goals for your painting? Many artists struggle to find time to paint with all their other commitments. Others are driven by a need to produce even better paintings, always searching for new techniques and colors. This article is all about enjoying the creative process and achieving rewarding results - not relying on a magic wand! Plus download your FREE e-book.
Read on to discover how the enthusiastic painter can gain success.
Just Click to Fix? It's easy to think that if you've got a problem, you can just look for an app and quickly fix it - the 'there's an app for that' mantra. However, this won't always be the case; sometimes you need to put in some old-fashioned elbow grease to really find a great solution.
Painting is one of those activities - it takes effort and practice, not a quick fix. This article headline may have promised a quick fix, but unfortunately that isn't possible with painting. So just how do we master this skill? Are you an artist feeling like your efforts are going nowhere? Don't give up! Improvement is possible - it just requires changing your approach. Take a positive step and find out if you can repeat it. The effort will definitely be worth it, so don't lose heart! Here are the solutions that will lead to success in your creative journey.
What you may need is a Simplified Painting Process: Here is how it works:
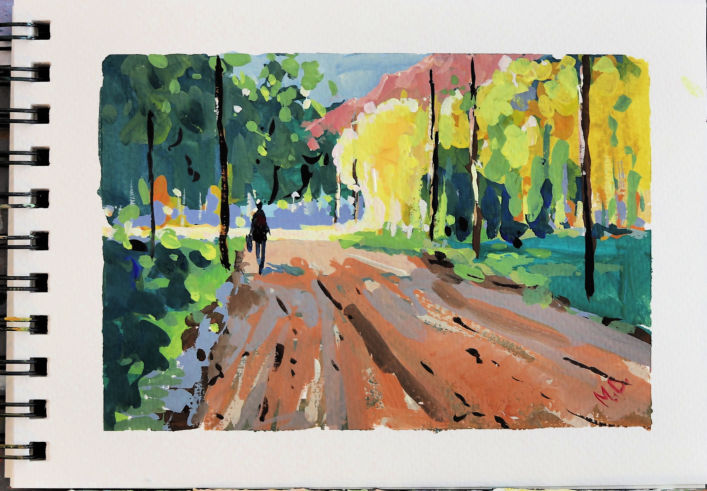
Step 1: Gather Information Start by gathering a scene that strikes you –– in your backyard or neighborhood perhaps, or from a holiday experience. Spend some time taking it all in with your senses. Enjoy the moment! Step 2 Assess the Scene Before you dive into a paintbrush, it's important to observe and explore the scene of your painting. Check for big shapes with strong light and dark contrasts. Doing some sketches or a notan study can help you decide on the mass shape structure. Take tons of photos too, so you remember all of your findings when getting back to the studio! It's in this process that you initially start creating your masterpiece - even without a paintbrush! Step 3 Start Exploring Paint Color Now it’s time to try out color! A color study is a simple version of your painting, just large shapes with no fine details. To keep things manageable, you can limit yourself to a 10 x 12” or 6 x 8” painting. Mix the colors and put them down on a panel or matte board – it's all about the color! Consider the darkness, lightness, warmth and coolness of each shape in relation to each other. Step 4 Start Blocking in Big Shapes Great! You've ironed out your composition and you're ready to start painting. Begin with dark shapes, then move on to the lightest lights such as the sky. Mix your middle values carefully - distant light tends to be cooler, while foregrounds tend to be warmer and more saturated. By the end of this process, you'll have your entire canvas covered. If things look good, you're in a great spot! But if not, take some time to work out what the issue could be. Step 5 Assess Values Take a step back and check out the painting as a whole - is something off? It could just be an adjustment of values that's needed. Your drawing's quality may not always be the issue. Instead, look at the structure of lights and darks - this is what makes a painting! Even black and white ones can look great based on those light-dark shapes. Get those right and you'll be golden! Step 6 Refine the Shapes It's all about the details! When you're painting, look out for variations of color within shapes. Think of them as pixels in a digital photo - many will create a clear image, few will make it blocky. Whether you want a photorealistic or loose, painterly style is up to you - just try not to overwork your painting; that'll lack spark! Finishing is personal for each artist - when adding another brush stroke doesn't add anything else to your work, you know it's done. Step 7 Corrections and the Light Effect When I paint landscapes, I look for a spark of light in my works - even the “ugly ducklings” need some zing! I stand back and assess the painting, occasionally looking at it with fresh eyes. Sometimes I even need to rely on a mirror to catch mistakes. To ensure that the lights pop out against the dark shapes, I tend to get my big brush back out to add intensity and drama. In the end, this creates more life in the painting! Step 8 Stop When should you stop working on something? Knowing when to finish is difficult and often comes with experience. You may need to "ruin a few paintings" before the lesson sinks in, as Leonardo da Vinci said, "Art is never completed, only abandoned". Letting go of your work can be daunting, but it allows it to stand on its own merits. Final Take-Away Persistence and simplicity may seem like opposites, but when it comes to painting, they go hand in hand. Painting can sometimes be a struggle - especially when it comes to sticking to the basics and each brushstroke is purposeful. When frustration sets in, that's usually a sign that you need to take a break. Don't give up! The answers will be there for you the next day when you're rested and ready. Hopefully this demonstration has been helpful in showing what I'm trying to say. You have everything inside of you needed to create something magnificent...now all you have to do is start and enjoy the process! Your Free Book:
Next Steps?
Share this post: |
AuthorMalcolm Dewey: Artist. Country: South Africa Archives
June 2024
Categories
All
FREE
|
||||||||
|





 RSS Feed


